Good things to eat

This Blog turns six!

So hard to believe it has already been six years, since I took those food writing classes, on those damp Winter nights back in 2011.

This blog was a class assignment.  I don’t know if any of you know this, other than blog writing people, that things that are posted on the internet, don’t really exist until you tell someone to look at them.

Click here to see very first post!

Sure, someone might randomly come across your post, but even that is unlikely unless you somehow  make it known to any search engine.  That’s why “tagging” is important or attaching it to thing like Facebook or Twitter.  So people can even know it’s there.

There are many tactics on how to get more traffic to your blog, like going to other like-minded blogs and “liking” stuff or commenting.  Then the other people who look at that blog see you and might want to check out what your blog is…..and so on and so on.

That’s why I say having a blog is kind of like having a bank account that you don’t really touch but it keeps getting interest.

In the last few years, life has gotten in the way of me being able to add and offer up things to the blog on a regular basis, yet every day, someone, somewhere, somehow takes a look at one or more of my posts.

That’s really cool.

Thank you for all the support over the last six years!  I wish I could promise to “get back at it” but we do the best we can with what we’ve got!

six-birthday

Firstly, I need to apologise for being so absent.

The truth of the matter is I’ve been quite caught up in getting used to my new life.

Earlier this Summer The Chef was offered one of those “too good to pass up” kind of jobs and so with only a few weeks notice, we packed up our whole lives and left our beautiful Victoria, British Columbia and moved to Edmonton, Alberta.

Not that there is anything particularly wrong with that, in fact, Edmonton is a lovely city and I hope to share some of it with you when I get back on a writing track, it’s just that we went from the warmest in Winter Canadian city, to arguably one of the coldest in Winter Canadian cities, which admittedly, I’m not doing too well with.

Anyone who knew me back when I lived in “Winter cities” knew just how miserable I was and how escape from Winter was the number one reason I moved to Victoria some ten years ago.

You see, I went from THIS

edmomnton-july-2016120

And This

iphone-download-nov-2016304
To THIS

img_1046

And This

img_1056

********************************************************************************************

So what to do in Winter in Edmonton?

Well……grow some Wheat Grass of course!

Probably like you, I’ve read SO much stuff about just how wonderful wheat grass juice is for you!  92 different minerals alone and filled with chlorophyll.  A wonder food touted with discouraging and perhaps even curing all kinds of diseases and aliments.  But what does it really taste like?

I can’t tell you how many times I have bought a flat of it at the health food or grocery store and brought it home with the intension of juicing it!  But instead I just let it over grow and then watch it turn brown and dies and make me feel sad.  And it isn’t cheap either which is an added annoyance.

So I decided to kill two birds with one stone.  I thought I’d try to grow my own!  Chances are if I grow it myself, I’ll be more inclined to use it?  And at worst, if I don’t, I can just compost it and recycle the dirt and try again.

And, it’s something fun to do in Winter!

********************************************************************************************

Growing it is surprisingly easy.

You will need:

  • something to grow it in ( I’ve been using left over lettuce boxes)
  • some quality dirt ( preferably organic cause you are growing food)
  • some “wheat berries” – I got them in the bulk section of the grocery store or Bulk Barn

Prepare your dirt in your box or whatever you are using.  Then soak about a 1/4 to 1/2 cup ( depending on how big your box is) of wheat berries in water for about six hours or overnight.  Drain off the water and sprinkle speeds evenly over the dirt and lightly cover them with more dirt.

Keep the dirt moist but not wet.

In a couple of days you will see the grass sprouting up!  Easy as that.

********************************************************************************************

Let the grass blades get to about 3 -4 inches tall before you use them.

Obviously by the picture here, you’ll see I let them go just a little too long but they were still good.

I then went online and watched a bunch of videos of various Hippies juicing their wheat grass to try to get an idea of just how much I need to actually get a yield of any kind.

There are a lot of variables there, like what kind of juicer or blender or whatever.

Also, some people seemed to drink it straight in shots, while others added water or added the juice to other juices or smoothies………

I think the real point is to try it first….see what you think.

img_1041

********************************************************************************************

So when you are ready, hack off some of the grass.  Even though it is in my kitchen, I still washed it, cause it can still be dusty or whatever.

Then I shoved it in the juicer.  As the pulp squished out, I put it back through the juicer a couple of times because I saw one of the hippies doing that.  It still seemed to squeeze out more juice, so I guess that’s good.

I yielded a couple of ounces.  But honestly…..that is about all you need for a shot.

img_1044

So?  How did it taste?

Well……..the smell is a bit much.  Literally smells like squished grass.  Don’t know if you ever ate any grass as a kid, cause you saw your dog doing it?  Well….it’s all a similar experience.

I gulped it down in one shot. As it went across my tongue it was very intense and so I was expecting a horrible aftertaste, but surprisingly, it wasn’t offensive at ALL.  In fact, it was almost a bit sweet!  I know!  Who would have thought??

img_1045

Many have reported extreme reactions to it.  Like having to run to the bathroom because something was going to happen from one end or the other.  I experienced neither of these.  In fact, it made me feel quite invigorated, like I had just done something terribly good for myself!  Power of suggestion?  Perhaps, but you might want to give it a try for yourself…..to at least to be able to say you’ve done it.

If you don’t want to go to all of the trouble of growing it and juicing it……..go to your local juice bar and give it a try……especially in Winter…..can’t hurt!!

Pluot Skillet Cake

I keep coming back to this old recipe. In fact, I’m going to make it for Sunday dinner tonight. Just thought I would share because Pluots are currently in season and really quite delightful.

what have we got here?

I have to be honest with you, I’d never heard of a Pluot until only a few years ago!

While visiting my California cousins, we went to a farmers market where I first spied the strange little speckled plums!   But after trying them, I fell in love.

They have a much milder taste than the plums I am accustomed to and are very enjoyable.

So I had a few in my fruit basket that were getting just a little too ripe to eat comfortably so when I saw this recipe for something else, I thought why not try it with the pluots?

Pluots

I saw this original recipe in EAT Magazine which is a local publication celebrating food on Vancouver Island and other British Columbia locations.   I didn’t have everything that the recipe called for so I will give you the real recipe and then what I used instead.

  • 1…

View original post 269 more words

The Nine Course Affair

Speaking of birthdays…….

From time to time, the Chef and I like to put on “special dinners”.  Usually consisting of  a several coarse tasting menu.  He does most of the cooking, while I do the arranging, the shopping, the decor and the clean up.  And if I’m lucky, sometimes I actually am allowed to make a dish or two myself!


_________________________________________________________________________

First Course:

Seared Tuna, Avocado and Red Pepper Sushi

I have to admit, the Chef does a nice sushi, which is good because I only ever eat sushi at home, what with the shell-fish allergy, eating it in restaurants is just too high risk.


Sushi


Second Course:

Belgian Endive and Mini Kale Pancakes topped with Smoked Gorgonzola and Candied Walnuts

This was a tasty one.

They don’t show up that well in this picture, but I made mini versions of my famous Kale Pancakes.  Then to add some freshness to it all, they were alternated with leaves of Belgium endive.  Then both were topped with a small slice of smoked Gorgonzola cheese and a chunk of candied walnut.

We often enjoy this as an anytime snack.


endive & kale pancake


Third Course:

Beet Carpaccio Salad with Arugula, Blood Orange and Shaved Boursin Cheese

I really like beets, so I always encourage the Chef to somehow incorporate them into our special dinners.

So on this occasion, he thinly sliced both red and golden cooked beets.  Then topped them with super thing slices of Boursin Cheese, ( I’ll tell you another time about how he does that, because if you have ever dealt with Boursin, you know that slicing it in any way isn’t easy!) slices of blood orange, arugula and then drizzled with a raspberry vinaigrette.

Very refreshing.

Beet Salad


Course Number Four:

Halibut  “Fish and Chips”

This was a whimsical item.  The “fish and chips” refers to the halibut being roasted with grated yam on top and then drizzled in a balsamic dressing.   The yams form and nice crust (chips) and keep the halibut moist (fish) and then vinegar on top.

Halibut


Course Number Five:

Spinach and Pine Nut Stuffed Chicken Breast with roasted Celeriac Puree and marinated Red Cabbage

I hate to be judgemental, but I think this one was my favorite dish of the night.  The chicken was moist and flavourful, the celeriac both sweet and earthy at the same time and the crunch sourness of the cabbage just all really worked well together.  Oh and I didn’t even mention the delicious grainy mustard sauce in the title ( made it too long to look good on the page)!


Stuffed chicken


Course number six:

Shaved Brussel Sprout Salad

I actually got to make this course myself.  It is a favorite of mine to make and to eat and it often shows up on our special dinner menus.  But I can’t take the credit for it.

It is blatantly stolen from the menu at celebrity Chef Michael Chiarello’s Napa Valley restaurant, Bottega.

We tasted it there awhile back and I was determined to recreate it.  But luckily for me, they were generous enough to just post the recipe on-line!

So please do try it out for yourself.  It is surprisingly wonderful.

Brussel sprout salad


Course number seven:

Mediterranean Lamb & Bell Pepper Kebobs with Cous Cous and Kaffir Lime Leaf Scented Demi-Glace

It is a little joke we have with the birthday guest.  Inevitably whenever we go to her place for dinner, she serves lamb!  So it only seemed fitting that there should be a little lamb on her birthday party menu. The startlingly delicious item in this dish was the Kaffir lime leaves.

They don’t really show in the picture but they were in the sauce.  At this point in the evening ( course seven) sticking one’s fingers in the food and pulling out the lime leaves and sucking on them was clearly NOT frowned upon.  What a delightful taste, the tart lime flavour mixed with the luscious demi glaze.


Lamb


Course number eight:

Cheese & Apple

It seems we were just too delirious by this point to actually remember to take a picture.

We had retired to the lounge for a little reprieve before moving on to desert but just wanted to add this extra little treat to the mix.

Norwegian Ski Queen cheese, is just a delightful thing to try.  Although it is a cheese, it would remind you more of a really rich version of those caramel square candies that we used to get a Halloween. Perhaps those crossed with butter or some other unbearably delicious creamy substance.  You really do need to try it.  We find it in the speciality cheese section of most major grocery stores.

So our eighth course was slices of Ski Queen matched with slices of Ambrosia Apples lightly dusted with fresh cracked black pepper.

Really nice.

( No Photo Available )


Course number nine:

Raw Chocolate Tart topped with Pomegranate accompanied with fresh chunks Pineapple and Chocolate dipped Candied Ginger.

I also got to make this one!

If you have been following this blog for a while, you know that I like to startle people from time to time with my “raw” dishes.  So after a somewhat decadent night so far, I thought why not toss in something a little healthy to end the evening and leave us feeling good about ourselves!?


Cake


It was a very successful evening.  Good times all round.

Stay tuned for when the next one happens.  Who knows, YOU might even get invited!


Thumbs up

Five Years Later


It’s true, this blog turns five years old today!

5 year


As ledgend has it, it all started when I took a food writing class and one of our assignments was to start a food blog……you know….just to learn how to do it, set it up and the like.

I wonder how many people from the class still have theirs?

I’ll admit I’ve been a little lax with it over the last year, maybe two years, but not because I don’t like it.  It’s more a case of just running out of food to write about……or is it?

The real truth?  My computer is really really old and slow and drives me crazy, because believe it or not, writing a blog is kind of involved.  Adding pictures and formating and all that stuff.  So when your computer it crap, it is very discouraging and a great deterrent.

I know, just get a new damn computer!  I really suck at that.  I have tried so many times and just always chicken out, so worried I will get the wrong thing.  This one may be really slow, but at least I know how to use it!

Anyway……….


com

The very first blog was called ” Can you really make pasta with a Juicer” and was featured right here on February 19th, 2011.

So I thought how better to commemorate the occasion than by seeing if I can “Make nut butter in a juicer”?

Natural nut butters are very expensive in the store.   Admittedly, so are nuts, but not as expensive as the pre-squished ones!  So why not make your own?

Well, sometimes because it is easier said than done.

I’ve tried making it a few times in Vitamix, the Cadillac of blenders.  I think on the right setting Vitamix might even be able to do your taxes!  But for nut butter, it grinds it well enough but because of the shape you really lose a lot of product that gets gummed up down in the blade area.

So then I tried the plain old food processor.  This seems to work well on most occasions, but on this one, something went wrong.  Perhaps it was because I was using frozen nuts?  Not sure what the problem was, but it just simply didn’t want to stick together and become creamy.


IMG_0364


So after grinding away at it for way too long, I looked up and spied the juicer sitting there.  I know that the juicer comes with a “blank” attachement, the same one I used to make the pasta.

I scooped the nuts out of the food processor and stuffed it down the feeder chute of the juicer……..

What came out……was even more dry and unpleasant than what had been at the bottom of the processor.


IMG_0365


But that’s the thing about food blogs, they don’t always have to be about the successes.  Sometimes it is good to share one’s failures as well.  You know, to spare the reader the same misfortune.

I tried to eat it anyway……but it really wasn’t very good.


IMG_0366

The point of all this?

Blogging is fun.  Who ever would have thought that any ol body, any ol where, can write about whatever nonsense is going on with them, and someone, some where WILL read it!!

Marvelous!

Happy Blogaversary to me!


5


A Warm Lunch at the Office

Anyone who has been following this blog for a while knows that I am NO fan of microwaves and have not (knowingly, although I realize it must happen to me some places!) eaten microwaved food in at least 10 plus years!

But when the weather starts to turn this can pose a problem for a girl who is looking for a little warmth at lunch time at the office and there is no way to heat anything up except the you know what!

So imagine my delight when I saw THIS idea!!

Please forgive me, I do like to give credit where credit is due but I do subscribe to a lot of food blogs and can’t always remember where I see what I see and regrettably I couldn’t find this again when I went back to look for the instructions.  So thank you idea giver.

So let’s call them Homemade Noodle Pots.

We’ve all had them.  Some are better than others.  But even the “organic” “healthy” versions are still pretty much weird dried stuff in a cup.

You know what I’m talking about.  Those instant lunch things that come in a cardboard, or worse, cup.  You peel back the lid, pour boiling water over it, cover it up again, let sit for a bit and voila.  A cup full of some kind of warm, usually desperately salty, noodle type stuff.

And they aren’t even that cheap, especially the higher end ones!

So why not just make your own DIY noodle pots?

You can put just about anything you’d like but best of all, you know exactly what’s in them!

And what’s great, on a Sunday afternoon, you can make up all of your ingredients, pack up your jars and have one for every day of the following week!  Imagine?  A whole week of not having to worry about what to bring for lunch??  Fantastic!

********************************************************************************************


Noodle cups006

Here is what you will need:

Heat safe jars, like Mason Jars 500 ml size x days of your week

Flavour base: I tried different combos for each day to change it up a little.

1 to 3 teaspoons of organic or quality soup stock base, miso paste or curry paste

More Flavour:

1 to 3 teaspoons of:  coconut milk, sesame oil, hot sauce or Sriracha, tamari or Bragg sauce etc


Noodle cups005

Fillers:

Chicken, tofu, frozen vegetables, shredded cabbage, cooked lentils or beans, thinly sliced mushroom, kimchi, hardy greens, boiled egg, or whatever else you might find in the fridge!

Noodles:

Cooked Soba noodles, spaghetti, rice noodles, ramen.   I haven’t tried this yet, but maybe dried couscous?

Toppings:

Green onion, Cilantro, shredded carrot, a slice of lemon?

********************************************************************************************

Start with the flavour bases on the bottom of the jar, spread them around so they will dissolve evenly.

Then add in your filler items.

Then the noodles and pack it down nicely.

Then finally what ever fresh toppers you might be using. ( if you want these really fresh, perhaps store separately and top the noodles just before eating)

Put the lids on tight and refrigerate!

Each morning, grab one to go!


Noodle cups004


********************************************************************************************

When it’s time to eat, simply add some boiling water and replace the lid.

Let sit for a few minutes to let everything warm up.  Then maybe give the jar a little shake or a twirl before you open it or give them a good stir with your chopsticks to let the flavours mingle.


Noodle cups003

You can enjoy it right out of the jar or dump it into an awaiting bowl and eat right away while it is warm.


Noodle cups002

And there you have a nice warm, weird stuff free, bowl of niceness to get you through your afternoon!


Noodle cups001

Peach Skillet Cake

This is a recipe I like to pull out this time of year.

Although I’m calling it “Peach Cake”, it should really be called “Insert fruit or berry of your choice cake”!  Because most any fruit or berry could be substituted.

In fact, when I did my original post on this I called it “Pluot Skillet Cake” because I had just newly discovered the pluot, cousin to the plum and was all about making stuff with it.

And then the original recipe that I first saw the with the idea for this cake, made it with blackberries.

So seriously, use whatever you like!

Click HERE to see the original posting on this and to get the recipe.

Peach cake

I’ll admit, the thought of it was very intimidating.

I was picturing something very exotic, or spending all day in the kitchen over large vats of something or other.  Requiring group of friends working feverishly to complete it in one day.

Or the need for hard to find equipment or ingredients.

Trouble was, I guess I didn’t really even know what Kimchi was.

What it comes down to is pretty much Korean style sauerkraut.

Something people have been making for years with little more than a bucket or crock, some salt and a big rock!

So why was I getting myself in a tizzy over it?  Why not just give it a try? Cabbage is pretty cheap, if it doesn’t work out…..oh well.

I’m almost embarrassed at just how easy it really is!

Then again, fermenting of food has been around a LONG time.  That’s how many cultures have survived by being able to preserve the bounty of the Summer for the long Winter ahead.

And then don’t even get me started with just how very good for you it is!  Talk about probiotic!!  This stuff is where it’s at!!

So not even knowing where to start, I did what any smart person would do, I looked up some recipes on the internet!   Admittedly, there were several and true, some did sound a little exotic and involved but I managed to find one that made sense.

Many of the recipes also called for “fish sauce” or “shrimp paste”, two things I actively avoid due to my shell-fish allergy but found no trouble working around that.

There were many many recipes, but I finally decided on this one:  Homemade Vegan Kimchi

I did not have, nor had the time to look for, the Kochukaru ( Korean chili powder) so I improvised on that.

I also didn’t make as huge of a batch as this recipe appears to make, in case it was disgusting and then I would have went to all the trouble and then would have to toss it!!

Here is what I used:

  • 1/2 large napa cabbage
  • 1/2 (maybe less) daikon radish
  • 1/2 red onion
  • Salt  ( Kosher or sea)

For paste:

  • 4 green onions
  • 5 cloves garlic
  • 1 inch fresh ginger
  • 2 birdseye Thai chilis ( small red ones)
  • 1 tbsp smokie paprika
  • 1 tbsp miso paste
  • 1 tbsp sugar

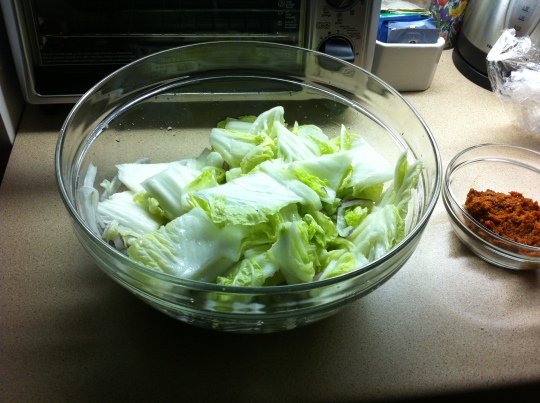
I peeled the leaves off the cabbage one at a time until I had taken off about half of them.  Use your judgement depending on how big your cabbage is.   After washing them, chop them into about 2 inch chunks,

I used only 1/2 of the daikon because it was quite large.   Peel it and then cut it into strips.  Smaller than French fries but bigger than match sticks.

Slice the red onion into full circle rounds about 1/4 inch thick.

Place all of these ingredients in a large bowl and then sprinkle generously with salt and toss to make sure everything is getting some salt on it.


Holiday treats002

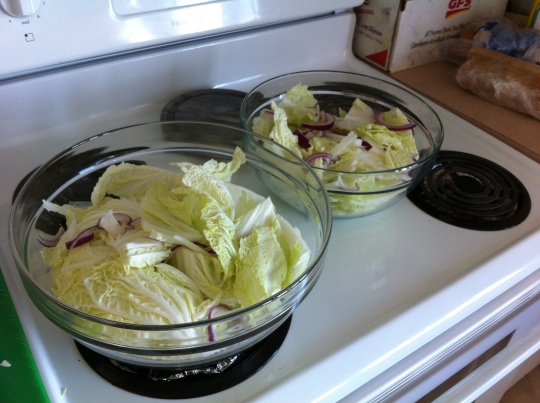
Then let it sit for a few hours until it gets quite whilty and releases some liquid.


When the cabbage mixture is ready to go, it is time to make the paste.

Holiday treats003

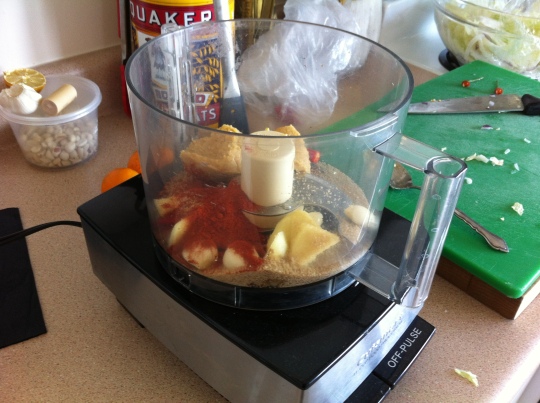
Add all of the other ingredients ( except the green part of the green onions, just chop and mix those in   with the cabbage, but do it now, not during the wilting part) to the food processor and combine till it makes a nice paste.  ( Add a bit of the cabbage water if it is too thick)

Holiday treats004


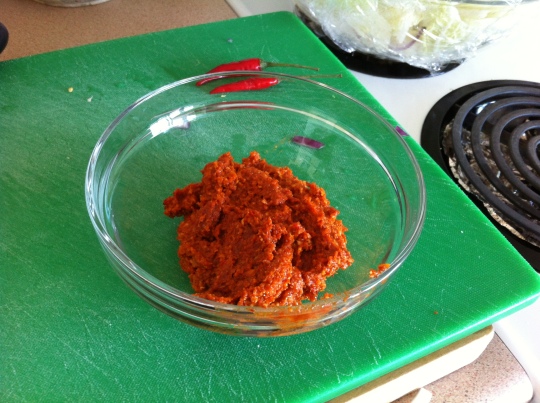
Then add the paste to the wilted cabbage and toss well until everything is nicely coated.

Holiday treats005


Holiday treats006

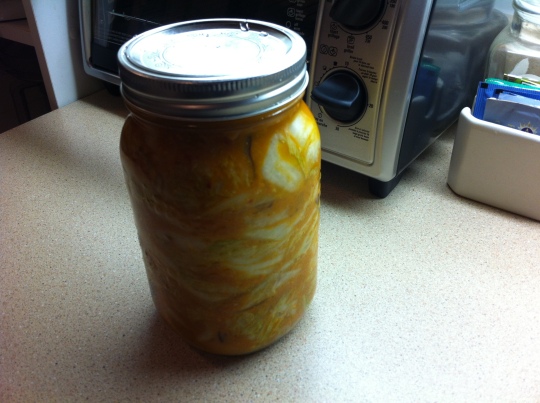
Then carefully shove it all into a super clean Mason jar ( or more).  The other recipe suggests poking it down with a chop stick.  Really pack it in there, making sure there aren’t any air pockets.  And then pour in any remaining liquid from the bowl that will fit.

Seal it up tight and let it sit on the counter for 24 hours, then into the fridge for at least a week before testing it!


ONE WEEK LATER:

Time to check out the magic!!

A huge word of caution here that no one seems to mention in any of the recipes I saw…….

Kimchi is ALIVE!!  Fermenting is done by live ( but very friendly) bacteria and so after they have done their work on your cabbage, they are eager to show you!!

So when you open your new Kimchi for the first time, DO IT OVER THE SINK!  It is almost like a bottle of soda that has been shook! And it WILL spew everywhere!!

I had NO idea!!

Once that nonsense was over and I safely got the lid off…….I gave it a sniff.  It had a strong odor and it wasn’t particularly appealing, but the time of truth had come.  Time to taste it.


I was fully ready to dislike it, but instead I was surprised, amazed and delighted by the taste of something that I quite honestly can’t say as I have tasted before!   I was expecting something tangy, vinegary or pickley.   But it was none of these.

Instead, it was the most delightful mixture of salty, sour and a little bit spicy.

I was absolutely delighted with my experiment!

Since then, I have become obsessed with my Kimchi!!  As the lady in the commercial says “I put that @#%$@* on EVERYTHING!”

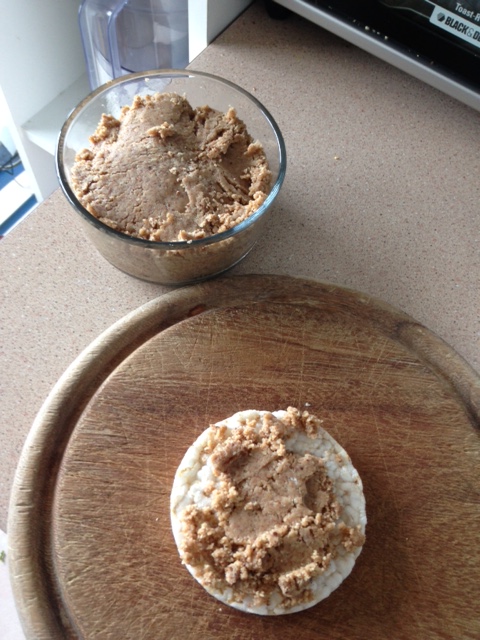
It is particularly wonderful for livening up any old boring sandwich!!  Fabulous as a burger topping, adds zing to any rice bowl type dish.  Add it to salads or as a condiment with eggs or omelets.  I could go on and on and keep trying it with everything!

Just DON’T heat it!  It is a live food, heating it will destroy all of its goodness!!

So don’t be afraid, give it a try yourself.

I would be very interested to hear just you make out!


Holiday treats007


This Blog Turns Four!

Wow how time flies.

I always tell this story on the anniversary of the blog.  It was only supposed to be an exercise for a food writing class I was taking.  The assignment was to “set up a blog” and of course until anyone can actually FIND the blog, it sort of doesn’t exist.

But when I asked a couple of friends to check it out and comment to impress the teacher I got hooked.

I could write stuff and people could read it.  And some even said they liked it.

The first ever blog post was this one:  Can you really make pasta with a juicer? 

It was quite an involved project because again, I wanted to impress the teacher and wanted the inaugural attempt to be about something interesting.

I’ll admit I have been slacking on my posts in the last while.  Mostly because my computer is SO slow that I spend most of the blogging time yelling at it and threatening to toss it out the window.  But I promise, I’m going to do something about that very soon.

That and of course life getting in the way.  It’s also hard to keep coming up with interesting things to say.

I mean, don’t get me wrong, I still love to know about, read about, grow, cook and eat food and then talk about all those same aspects of food.  So hopefully I will get back to the writing about it part, real soon.

The other fun thing about blogs is that they are like having money in a good investment.  Even if I don’t post very often anymore, the old posts somehow still find their way to people to read.   In the four years since the blog started I have nearly 50000 hits!!

What’s really cool and completely by accident, is that is post will be the 400th post I have made, on the 4th anniversary.


Happy 4th Anniversary!

Happy 4th Anniversary!

It’s always a challenge, what to do with the left overs?

And let’s face it by now we are all SO sick of eating that even the prime freshly cooked food seems grim, let alone eating the same stuff for three days!!

Well, here is this year’s offering to help use up a few items!

*****************************************************************************************

Ever find yourself with some dregs of cheese left over from a lovely cheese plate?  Bits and bobs of perfectly still nice cheese that you paid good money for so you don’t want to just toss it out, but it’s gotten a bit dry or tired looking from sitting out or not being properly wrapped and being shoved in the fridge after a night of merry-making?


Left over bits of cheese

Left over bits of cheese


*

Holiday treats010

Finely chop up all the left over bits of cheese, removing any heavy rind.


And of course who doesn’t  have some left over turkey??

Well……how about………

Turkey Macaroni and Cheese?

I didn’t even have any “actual” macaroni but it have some spiral pasta in the pantry, which worked just fine.

Here’s how it went down.

Boil up a few cups of pasta of your choice.

Meanwhile, in a skillet, fry up some onions and some cubed turkey.  You could even toss in some veg at this point if you had it, but I didn’t.


Sauteed turkey cubes and onion

sautéed turkey cubes and onion


Then, in a sauce pan, make up a cheese sauce according to your favorite recipe.

I used a bit of butter and flour.  Made a roux and added milk.   Then gradually added the bits of left over cheese from the cheese platter, finely chopped.  Be careful with any that have a heavy rind that won’t melt down.


Holiday treats013

Cheese sauce from left over party cheese plate


When the pasta is cooked, the turkey and onions sautéed and the cheese sauce made, mix them all together in a large bowl till thoroughly combined and then transfer to the casserole dish of your choice.


Holiday treats014

Mix all ingredients together and transfer to a baking dish


Now here’s where things got CRAZY…..

I didn’t have any bread crumbs so I chopped up some left over bread stuffing and spread it over the top!


Holiday treats015

Turkey Macaroni and Cheese topped with stuffing


Bake at 350 degrees for about one half hour, then uncover for about ten minutes till the top crusts up a bit.

There you have it!!

This is a very versatile dish that you can use up all manner of weird left over bits in the fridge!  Only your imagination is your limit!!


Holiday treats017

Yum


Savory Oatmeal Cookies

Okay, who are we kidding, they are still called “cookies” for a reason!!

But my problem with things called cookies is that it always conjures up something bad for you, something void of nutrient, something…..silly.

So yes, this is called a cookie and does have many of the ingredients found in traditional cookie, but this one has been jazzed up to pack as much extra nutrients as we can into each little bite.

The other great thing about these is that they contain very little sugar!  BONUS.

If you have been following this blog for any time you will have gathered that I am on a life long quest to find an agreeable substitute to the traditional store-bought cracker!

As tasty as some commercial crackers might be, they inevitably always give me heartburn and usually after I’ve read the package I can tell why!

And some of my home-made cracker experiments have gone better than others but usually turn out to be more suited to people with dietary restrictions who are happy to get whatever they can that they can actually eat.  So compared to “nothing at all” they are fine but not exactly a great snack that you would binge on, if you know what I mean.

But I think I may have finally found what I am looking for with these babies.

They have lots of good for you stuff in them, not too much bad for you stuff and they actually TASTE great!!

Give em a try.


You will require:

  • 1 cup large flake rolled oats
  • 1 cup all whole wheat flour ( or combos of your choice)
  • 1/4 cup golden or regular flax seeds
  • 2 tbsp brown sugar ( or equivalent of sweetener of your choice)
  • 1/2 tsp sea salt ( little more if you like things saltier)
  • 1/4 tsp baking SODA
  • 1/4 cup good olive oil
  • 1/2 cup grated cheese ( I used old cheddar but parmesan would be good too)
  • 1 egg

Optional but strongly recommended additions:

  • 3 green onions finely chopped
  • 1 tsp chopped herb like rosemary
  • a few turns of cracked black pepper
  • good finishing salt to sprinkle on top


Whip out the Mix Master, although a mixing bowl will do just fine and add:

The oatmeal, flax-seed,brown sugar, olive oil and egg, stir together and let sit a couple of minutes till the oats get a bit gooey.

Then add, salt, baking soda, (onions and herbs), grated cheese and mix those thoroughly into the mixture.

Then a few spoonfuls at a time, add in the flour and keep stirring it in till the dough comes together nicely but isn’t too gooey or too dry.  So you might end up using a little more or a little  less than the original cup size asked for.  But the other ingredients can be more or less absorbent, so you won’t know for sure till you are in it.

2014 Summer057

Then you are going to line a baking sheet with parchment and if you haven’t already done so, heat your oven to 350 degrees.

I just used two teaspoons, one to scoop out of the bowl and one to push it off the first spoon on to the tray.  Just like any drop cookie you might make.

Then go over them with a fork and squish them down flat.  They don’t spread while baking like some cookies do, so what ever size you end up squashing them to, will pretty much be their final size.   Then sprinkle with a bit of finishing salt and into the oven they go!

2014 Summer058

Bake for about 25 minutes or until they get golden brown around the edges.

They are delicious immediately or in as long as it takes to cool enough as to not burn your mouth, or let them cool on a rack and then place in an air tight container and keep like you would any home-made cookie.

2014 Summer059

But the best part….to me, they are the answer to my quest for a home-made cracker!  They are great with a bit of jam or some cheese or whatever you like to put on crunchy flat things!!

2014 Summer060

What the Fig?

Our friends have a spectacular fig tree in their back yard.

So when they asked if we’d like some fresh figs to play with, the answer was “of course!”

But then what?

Now don’t get me wrong, Figs are GREAT for you!!  Click here to read all the cool things!

But what to do with fresh figs?  I notice they don’t have a very long shelf life once plucked from the tree, which makes me wonder how the ones we get in the supermarket from California manage to make it this far looking that good??

So here is what I came up with over the course of three days:


Note "fig leaf" in background.

Note “fig leaf” in background.


*********************************************************************************************************

Figs in Smoothies!

No brainer.

Chalk full of fibre and goodness without being overly sweet!


Riff 2013017


*********************************************************************************************************

Little fig pizzas:

Super simple.

Take your favorite pita ( or in this case naan bread), or if you are feeling particularly ambitious your own homemade pizza crust……

Add:

  • carmelized onions
  • slices of fresh fig
  • crumbled blue cheese ( or goat cheese but blue is nice with the fig)
  • pine nuts

Put it in the oven till the cheese melts and the figs wilt.

Top with a bit of fresh arugula if you have it.   ( I didn’t but would have like it!)


figs002

*


figs003

*

figs004

*********************************************************************************************************

Next item up is a little more hearty.

Fall is just around the corner so I thought I’d practice a dish that would go well on a cooler day.

“Lamb, Lentil and Fig Stew”!

Again, so easy, but SO satisfying.

In a large pan or Dutch oven :

  • Saute one large onion

Then add cubed lamb meat and cook till browned on all sides.

Then add:

  • 1 cup of rinsed green lentils
  • 1 clove minced garlic
  • 1/2 inch minced fresh ginger
  • 1 tsp ground cumin
  • 1 tsp thyme
  • OR  1 tsp curry powder
  • Salt & pepper to taste

Mix all until everything is well coated.  Then add enough water to just cover everything.

Let simmer till lentils are almost done add more water if needed.

Then add 3 – 4 chopped fresh figs!

Let simmer a while longer till lentils are done and figs have melted down into the stew.

Serve in your favorite way!

Shown here over a bit of mash potato and a little steamed broccoli on the side!

Figs II005

Did the trick and wasn’t at all sweet, but had the little “Je ne sais quoi”!!


*********************************************************************************************************

Along with the fresh figs we also received a jar of home made Fig Chutney from our friends.  We only had a twelve pack of figs to deal with, they had the whole TREE so preserves are a great way to go!!


Figs II008

And what better would Fig Chutney go with than Grilled Pork Chops with Roasted Veg??

This was really tasty!!


Figs II006


*********************************************************************************************************

And last but not least, you need to have at least ONE dessert item on the list!!  I mean it IS fruit after all!!

So I whipped up a little fig cake.

I pretty much made the same recipe as my once famous “Pluot Skillet Cake” and just substituted the pluots with figs!

Totally did the trick!


Figs II001

*


Figs II002

*********************************************************************************************************

So there you have it, Fig-o-lisious!!

What do you do with YOUR figs??

Food Movies

There are a lot of movies that involve food.  I mean why wouldn’t there be?  As humans, eating is one of our favorite pass times, so chances are, if you add food to your movie.  It will make people happy!

I had three note worthy food related film experiences this Summer.

Just the other day we went to see The Hundred Foot Journey.


MV5BMTQ3Mjg2MTE4M15BMl5BanBnXkFtZTgwMzcyNDMwMjE@._V1_SY317_CR2,0,214,317_AL_


It isn’t completely about food, there are some very touching human experiences involved as well, but food certainly would be nominated for “best supporting Actor”.

It is also very heartwarming and uplifting but warning, it will make you hungry!!


*********************************************************************************************************

And then earlier in the summer we saw the movie CHEF.

Although the title implies a heavy  food theme, it too has a warm and fuzzy human redemption story but is undoubtedly hunger inducing.

I was anxious to see this movie because in one of the episodes of  Top Chef New Orleans, the lead actor / director/ writer, Jon Faverau was the guest judge on the show.  He was in New Orleans doing research for the movie which is based around the whole food truck craze and in that episode of Top Chef, it was a food truck challenge.

I’m not sure how it did at the theatres, but if you should see it available on one of the many modes of movie watching and you like stuff food then check it out.

MV5BMTY5NTYzNTA1M15BMl5BanBnXkFtZTgwODIwODU1MTE@._V1_SY317_CR1,0,214,317_AL_

*********************************************************************************************************

But I think my most note worthy food film experience this summer was part of our local Foodie Film Fest.

Our Victoria Film Festival which usually happens in February branched out this summer to bring us something a little delicious.

A friend asked me if I would like to join her for one of the presentations.   Neither of us were completely clear as to what would go on.  The Film Festival sometimes puts on free movies in the park where you bring your blanket and a picnic so when we heard it was at a vineyard, we just assumed it would be the same sort of arrangement.

My friend has a fully equipped Westphalia camper van, complete with cooker stove and refrigeration.   So we went all out with the picnic aspect of the evening.   The movie wasn’t playing until dusk, so why not travel out to somewhere near the event, have our picnic and then attend the movie with our bellies already full?

We weren’t all together sure where we were going, so we thought it best to stop by and check out the location first and then go have our picnic.

Turns out it was at a gated estate vineyard, deep down a country road.  I guess because we were so early we sailed right though the gate and then drove up the long road to the top of the hill.  Up there we were met with a spectacular view and plenty of parking next to the wine tasting building and the location where the film showing was still being set up.

At this point we really saw no good reason to leave!

movie night002photo

*********************************************************************************************************

We busted out our dinner and some wine and watched the scenery as the sun started to go down.  It was magnificent.

But then we started noticing many of the other guests, who weren’t fortunate to have arrived early, traipsing up the long hill with their lawn chairs and baskets.  Seems the gates had been closed.   Weren’t WE lucky!!


movie night004

But it got even better!

When we saw that enough people were starting to gather we decided to check out the situation and pick up our tickets. Only to find out that included in the price of admission was a snack box of fabulous treats!  Fresh bread slices, pates, succulent cheeses and pickles all provided by Charelli’s Cheese Shop. Had we known, we might not have eaten as much back in the camper!!  Oh well.

As well, they were doing wine tastings at the tasting bar and you could buy glasses of wine to have with your snack box while you watched the movie!   All terribly civilized!

movie night001

People were quite jealous of us because not only did we have nice chairs to sit in and warm blankets for our lap but we also had a convenient little folding table to rest our goods on,that my friend brought out from the van.


movie night006

And just when I thought things couldn’t get ANY better, the lady next to me insisted that I take a glass of wine off her hands because she had bought two thinking she was getting one for her friend, who turned out to have already got one!

Then, of course there was the movie!

Brasserie Romantique

MV5BODQzNzAyMTA0OV5BMl5BanBnXkFtZTcwMDIyMDc4Nw@@._V1_SY317_CR5,0,214,317_AL_

And it had English subtitles which made it seem even more romantique!

Again, a lovely little movie with delicious scenery!


*********************************************************************************************************

It’s all making me think  that perhaps a home “food movie festival” might be a great idea!!

Cook up some good snacks and have a food movie marathon with  your best buds!


What’s YOUR favorite food film??

Butter Chicken Pizza

What could be easier than this quick assemble, dreary Sunday afternoon, lunch favorite?

All that’s required is some left over Butter Chicken, restaurant bought, or home made.

  • some Naan bread
  • some melty cheese ( I used smoked cheddar for extra zing)


Butter Chicken Pizza010

Place Naan on a baking sheet.


Butter Chicken Pizza012

Generously cover with the left over butter chicken


Butter Chicken Pizza013


Sprinkle with cheese


Bung into oven.

Simple as THAT!!

Butter Chicken Pizza014

I didn’t have any but you could top the finished product with some chopped fresh cilantro or finely chopped red onion……..or whatever you find that you have around.  Make different ones if you like!

Makes a great lunch or light dinner paired with a side salad……

Food Matters TV

Here is a little something I thought I would pass on to you.

The people behind such movies as:

hungry-for-change

foodmatters

Are now launching:

                            FOOD MATTERS TV

This is an online service much like Netflix only the content is all FOOD / HEALTH / WELLNESS  related.

And if you sign up now there are all sorts of bonuses.

And at the very least if you go to the site before March 31st, you can watch Hungry for Change and Food Matters for free.

Just thought I’d mention it.

Zucchini Fritters

Here is a surprisingly tasty snack for you.

Over the last few weeks there seems to have been so many “Snack Worthy” things on TV.  All of the award shows and of course the Super Bowl…….

So I was looking for something a little more interesting to serve than all the usual suspects.

I happened to find something similar to this on a Vegan website – no need to tell anyone they were Vegan and spoil the decadent impression that they made!

In the original recipe they were served with a cashew cream, so they were truly Vegan.

I served them with sour cream laced with Chipolte Tabasco sauce, which is still a Vegetarian item!

Start by grating:

  • 3 medium zucchini

Put the grated zucchini into a clean tea towel and squeeze it over the sink as hard as you can to get as much of the liquid out as possible!

Then add to a mixing bowl with:

  • 1 medium grated carrot
  • 3 Tbsp finely chopped red onion

Meanwhile grind in a coffee grinder or mini food processor:

  • 1 Tbsp flax seeds

And then add that to:

  • 3 Tbsp water

And let those sit together for about 5 – 10 minutes till they form a thick goop.

This is what we are going to use instead of the traditional egg.

However, if you don’t have any flax, or a grinder and don’t care about egg, by all means use egg!

Then toss together the flax with the zucchini, carrot, onion with:

  • 1/4 cup chickpea flour
  • 1 Tbsp arrowroot powder
  • 1 Tbsp curry powder
  • salt and pepper, to taste

Mix these all together till you get a nice thick batter.

Heat a skillet and add enough oil to coat the bottom, but I don’t like too much so they are swimming, but enough that the bottom is covered.  I even brush the oil around with a pastry brush so the pan is well coated.

Then start adding batches of about a 1/4 cup of mixture, as many as comfortably fits, and flatten them down.

Cook until golden and crispy on both sides.   Keep them warm in a low oven till they are all ready.

And then serve immediately!   With the topping of your choice.

These were really good considering there was no egg or real flour and really kept their shape.


zuccini fritters

This Blog is Three!

My how time flies!  I can’t believe that I have already had this blog for three years now!!

As those of you who have been following from the beginning know, it started only as an assignment for a food writing class I was taking, but I got so hooked that I never gave it up!

As of today I have reached just under 40,000 hits!  Yes that is 40 thousand!  And I am always amazed at how far it reaches.  Because as the owner of the blog, you can see the statistics where it tells you how many hits you’ve had and what people are looking at and where they are looking from.

I am always astounded at how far and wide the audience reaches.

And having a blog is sort of like putting money in a very good investment and watching it grow just on interest!  Because in this last year I haven’t been writing as much as I would like, yet people still seem to keep finding the blog.  I have no idea how that even happens!

One of the top posts that keeps getting looked at is the very first one:

“Can you really make pasta with a juicer

Another popular one that gets the most hit – yet I find a bit troubling because I fear this isn’t what they had in mind when they were doing their online search is:

Forbidden muffin balls

But my all time number one favorite that gets the most hits and even comes up as number one on Google – which means on the WHOLE interweb is:

Kale Pancakes

So thanks so much for all of the comments, love and support over these past three years!  Hopefully I can keep coming up with things to tell you about for at least another three!

3rd birthday

Ode to Celery

Oh celery, why can’t we just get along?

stalk-celeryWhat has happened to us in the past that I treat you with such disdain?  I’ve even been heard saying “I’d rather eat the dirt” that you came from!

For years I have brought you home at the peak of your magnificence, with your proud branches standing strong.  Only to lock you in the crisper to watch you die a slow and painful death.   First your limbs grow weak and limp, then you turn an off shade of brown and then sometimes I let you rot until you just become a bag of putrid liquid and then I get angry with your weakness for making such a mess and making the fridge smell off!

Why celery, why does this have to happen?

I enjoyed you as a child, when my Grandmother would fill your stocks with that bright orange “Cracker Barrel” cheese that came in the red tub.

Not like other things that I loathed as a child but have since grown to appreciate.  Things like beets, olives and blue cheese which I now adore.

No, with you it went the other way.  Your crunchy texture and distinct flavour offend me.  I alway know when you have been hidden in the tuna sandwich or are ruining a perfectly good potato salad!

People tell me I should love you.  You come baring so many healthful gifts.  You are high in Vitamin C which we know is so helpful for many body processes.  You are filled with calcium, magnesium and potassium which among other things, helps with blood pressure control.  You contain pthalides which increase bile production which can lower cholesterol and you fight cancer, arthritis and inflammation!

I want to love you celery, I really do.


*******************************************************************************************************

heart red-clipart-love-heart

Now I  know that all of the experts say that the key to a good food blog is enticing pictures of the dish that pull people in to read further and maybe even attempt your dish.

But I made something so delicious for brunch today, that I just had to tell you about it immediately.  I wasn’t even thinking that I would write about it because I had no idea it would be so good.   But then we gobbled it down and I never got a chance to take any pictures!

Hopefully just my description of the item will be enough to do the trick for you!

As anyone who has been following this blog for any length of time knows all too well,  I am a big fan of kale!  And that I like to use it in untraditional places.  Case and point in my kale pancakes.  But I have to say that this recipe is one of most looked at postings on this blog.  And in fact, if you Google kale pancakes, it is the first item listed!  On ALL of the interweb!!

So this morning I felt like making some eggs, but was out of bread for toast and it is a bit of a dreary winter Sunday so I didn’t feel like going out to get any.

What to make?  I didn’t really feel like anything too sweet………of course the kale pancakes!

So I whipped up a batch of the pancake batter, only I changed it up a bit and actually this version is completely Vegan.

Into the blender went:

  • 2 whole cloves fresh garlic
  • about 2 cups worth of ripped kale leaves, stems removed
  • 1 cup plain almond milk
  • 1 cup ( or more till you achieve right consistency) chick pea flour (or flour of your choice)
  • 1 tsp salt
  • 1 tsp baking powder
  • 1 tbsp curry powder

Whiz that all up in the blender and then let sit a bit.

Meanwhile, heat up your skillet ( I used two at a time to move things along quicker).

Once they are ready, add a bit of butter or oil of your choice and make your pancakes as you normally would.

Keeping the cooked ones warm in a low oven.

Once your pancakes are all cooked, use one of the skillets to caramelize an onion.

When it is well caramelized, douce it with a generous glug of good maple syrup!

Meanwhile, in the other skilled, fry up as many eggs as needed.  I did them to a nice “over easy” so that when you put them on top of the pancake and cut into them, the nice creamy yoke will ooze all over.

When ready to assemble, place pancakes on the bottom, then over easy eggs and then top with the maple covered onion!

Oh MAN was that good!

And if you were so inclined, feel free to add a little bacon or sausage to the equation and some extra maple syrup on top and you will have an impressive brunch item indeed!

I really wish I had a picture for you, cause it was THAT good!

Kale

Blueberry “Glosettes”

I was just surprised to find out that “Glosette” is an exclusive Canadian brand of confectionary!  Who knew!  I thought that Cadbury made them, but apparently Hersey bought them in 1987 from Nabisco so I wasn’t even close!

Basically a glosette is bit of dried fruit or nut dipped in some glossy chocolate.

So over the holidays I had a young visitor who for health reasons is not supposed to eat much sugar.  I didn’t want him to feel left out while everyone else was pounding back the sugar cookies and shortbread, so I tried to make him some healthy items so he would feel like part of the gang.

One thing I came up with was to make my own blueberry glosettes.   It was a bit labour intensive, but worth it in the long run.

I also made up some of these :  CLICK HERE

But for the glosettes I had to first dry out the blueberries!

Out came the trusty Excalibur dehydrator which really hadn’t been getting it’s fair share of use lately.

EXCAL-2500

Start by thoroughly washing and picking over your blueberries, discarding any dodgy ones.   And then I put them into a clean tea towel and  try to dry them the best you can.

Then onto the dehydrator try and in they go.

2013 holidays019

If you don’t have a dehydrator……..and I understand that many people don’t!  You can just put them on a parchment covered baking sheet and pop them in the oven on super low.  Like 200 degrees if you aren’t trying to make them “raw”.

Which ever method you use, leave them until they resemble raisins.

Once they are done, let them cool to room temperature.

2013 holidays023

Meanwhile, in a double boiler, melt some good quality dark chocolate.  I used the 70% cacao bars.

2013 holidays025

Melt the chocolate until it is just runny enough but still quite viscous.

Toss in your blueberry raisins , coating well, working quickly.

2013 holidays027

Now I’m sure at the Hershey factory they have some sort of fancy conveyor belt thing that makes them come out perfectly round, but at home you have to make due.

I tried letting them harden on a fresh sheet of parchment but will admit they came out flat on one side.

2013 holidays026

Or I tried putting them on a baking cooling rack with small squares, that seemed to work better, but it was a bit of work getting them off.

Perhaps you might have an even better idea of how to cool them and keep their shape??

Which ever the case, once they hardened they were a delicious, NOT so sugary treat!!

2013 holidays028