Good things to eat

Posts tagged ‘party snacks’

Rice Crackers

How does that saying go?  “Something or other is the mother of invention”?

Well with me, it is “expensive”.  I often come up with some of my best creations after trips to the health food store.  I walk the isles offended that they want to charge WHAT for THAT??

So then I get mad and come home and make my own version.

Today it is rice crackers.  Now with everyone on the gluten-free band wagon, rice crackers are abundant and varied and increasingly expensive.

So I googled “how to make rice crackers” and there were a few variations, but this is what I ended up doing and it was so simple.

You will need:

  • 1 cup cooked rice ( I used brown basmati)
  • 1 cooked potato or yam ( see note)

If you like you could just chop and boil the potato or yam, but I decided to roast the yam with a small diced onion like I do in my side dish ROASTED YAM to add a whole new depth of flavour to the cracker.

Then add rice and yams to the food processor.   Whiz them up until coarsely blended.

Then it is up to you what you might want to jazz them up with.  I added:

  • 3/4 tsp sea salt
  • 1 tsp sesame seeds
  • 1 tbsp pumpkin seeds
  • splash of olive oil

Whiz that up in the food processor till well blended.

Then dump the mixture out onto a piece of parchment paper that is directly on the counter or other flat surface.  Cover with another piece of parchment paper and with a rolling pin, roll the dough out nice and thin.

You may need to do this in two half batches.  With my first attempt it kept squishing out of the sides of the paper because there was too much in there.  You don’t want that.

Then when you have your dough rolled out to a nice size, remove top parchment and then carefully slip the bottom parchment with dough on top on to an awaiting baking sheet.

Use a knife to gently score shapes into the dough so that the crackers come apart easily when baked.

Then put into a 300 degree oven for about 45 minutes or until they are crisp but not browned.

Can it get easier than that??  And for a FRACTION of the price AND they are gluten-free!

BAM!

crackers011

And they turned out delicious, probably my best attempt at home-made crackers yet!

Kinda Calzone

I guess to answer my own question of where do people even FIND my blog, I have recently signed up on some site that sends me all kinds of other blogs to read.

I found this one (click here) particularly intriguing, mostly because it was in Swedish!!

It is so interesting how it doesn’t really mater where you are from, people who like food, like food and like to talk about it!

While checking out this particular blog I found a recipe for something called Piroger and thought maybe it might be some sort of Swedish perogi.

Well it wasn’t, but it was a pastry type item filled with a delectable filling……so close enough

I was thrilled to find out that there  is a “translate” button.  I’m not sure if that is something built-in to that particular blogging software or just an internet thing…….but how great!!   So I clicked “translate” and I was in business!

I have to admit that some of the word choices or the sequence in which they are used are a little wonky but at least it gives you a good idea.  So please, I encourage you to not be afraid when you see foreign language food blogs!  You just might find some treasures!!

***********************************************************************************************************************

So I thought I’d give the Piroger a go.    In English they seem to be “Patties with turkey, thyme and paprika” which I admit isn’t quite as exotic but still a nice idea.

I didn’t happen to have any of the ingredients for the filling, but I really liked the idea of baking something tasty inside a bread like bun.

So I started by making up a batch of her dough and letting it sit for 30 minutes, as directed.

Then instead of the turkey filling, I made up a batch of my old favorite Nelson’s Beans and then let them cool right down to room temperature and then added about 3/4 of a cup of parmesan cheese just to thicken them up.

calzone002

What ever you decide to use as a filling and that’s what really excited me about this because I can see using all kinds of different things!  But whatever it is, make sure you make it with a think consistency.   You really don’t want to be putting anything too runny or oozy because it will just be too hard to keep inside the dough!

calzone004

So with my Piroger dough and my Nelson’s beans, I started to assemble my nice little patties.   I did add some salami into some of them because the Chef still likes his meat.

Then, as directed, let them rise for about another 30 minutes, then into a 450 degree oven until they get nice and toasty looking.

calzone005

Serve as you wish.

calzone008

What excites me about these it that they seem a perfect solution to my on going “work lunch” dilemma.   A nice little pocket of goodness that will taste great hot or at room temperature.

Thank you Praline in Sweden!

Going to a party?

Here’s a little something for you!

These are great to make for your own parties but even better to bring to other parties!

Let’s call them “Bacon, leek pinwheels”.

Start with a nice big sheet of store bought ( or make your own,but then kind of defeats the easy factor) laid out and thawed.

Bacon leak roll ups007

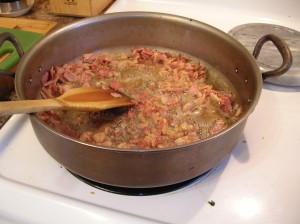
Meanwhile in your favorite vessel, cook up about 6 -8 strips of bacon, but cut them into tiny “lardon” strips before cooking.

Bacon leak roll ups001

Once those are well on their way add 2-3 finely sliced ( I used the mandolin) leeks, white part and a bit of the green.  But what ever you do make SURE to wash them before putting them in the pan!!  Nobody needs leak sand in their snacks!!

Bacon leak roll ups004

Cook those down into the bacon.

Then add:

  • a couple of cloves of minced garlic
  • a generous splash of balsamic vinegar
  • sprinkle of chopped rosemary ( dry or fresh)

Keep cooking that all down till it becomes leeky bacon goo.

Bacon leak roll ups006

Let it cool.

Once it is at room temperature, smear it evenly on to your puff pastry, leaving about an 1 inch band on one side.

Bacon leak roll ups008

Then top the bacon leak mixture with your favorite grated cheese.  I used my good ol Horseradish cheese for an extra zing.

Bacon leak roll ups009

Then cut the whole thing into about three strips along the short side of the pastry.

Then start at the top where the filling is and roll the pastry down till you get to the blank spot, moisten the edge with a bit of water, then press it into the roll and tighten it up.

Bacon leak roll ups010

Now here’s the big “Chef trick” that will make things so much easier!!  Pop the rolls into the freezer for about half hour.  This will firm them up really nice and make them SO much easier to slice!!  Guess who taught me THAT trick??

So once they have firmed up in the freezer, take them out and slice them into about 1/4 inch thick rounds and place them on a parchment paper covered tray.

Bacon leak roll ups012

At this point you can proceed, or pop them into the regular fridge till you are ready to bake them.

When you are ready to go, preheat oven to 400 degrees.

Then give them a little brush with a beaten egg and then if you like, sprinkle on some chunky finishing salt and into the oven they go!!

Depending on the speed of your oven, they take about 15 -20 minutes to bake.  But keep an eye on them, you don’t want your party masterpieces to burn!

When they puff up and are golden brown…..they are good to go!

Bacon leak roll ups014

Take out and let cool down to room temperature if you are transporting them.

Or eat immediately…….if you are……eating them immediately!

But this batch was going to a party.

A great thing I love to use to take stuff to parties is discarded baby greens boxes.   They are sturdy enough, have a nice fitting lid and the best part?  You don’t CARE if you don’t bring it home again!!

Off you go to your party……

But a word of caution.  You might want to tell people that they are a savory snack, for some reason at the party I took them to, everyone thought they were cinnamon buns!  But they all got gobbled up none the less!!

Bacon leak roll ups017

Salmon on a stick

It’s been award show season and on this particular occasion, I wanted to make something interesting to eat while we watched but wasn’t really feeling like the usual “party snack” fare, so this is what I came up with.

111030

First and foremost important thing?  Soak your sticks in water!!  I was using bamboo skewers, but these or any wooden ones must be soaked for at least 1/2 hour in water so they don’t catch fire in the oven or one the grill!

Then I placed a few strips of bacon on a parchment covered tray and put them in the oven at about 300 degrees because you want them to cook slowly and not crisp up at all.  When they are almost done, but still very bendy, take them out and let them cool down till they are cool enough to touch.

111024

Meanwhile, chop your salmon into nice 1 inch by 1 inch chunks, or there abouts.

111023

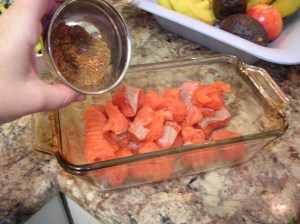
Then add the dry rub which today, I was going for a bit of a “Cajun” type taste, but whatever you want is fine.  Maybe you even have an actual prepared dry rub that you already like.   But I mixed up:

  • cumin
  • coriander
  • smokie paprika
  • thyme
  • chili powder
  • clove ( small bit)
  • oregano

111020

Mix it into the salmon chunks and let sit a bit to get acquainted.

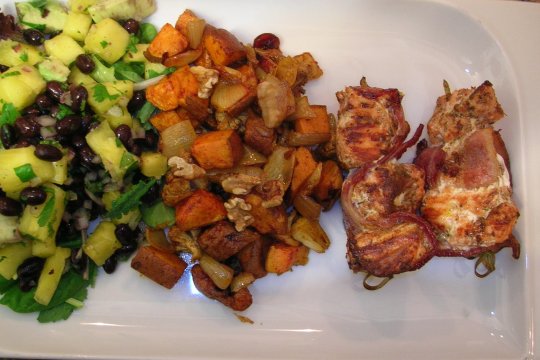
Then as side dishes I made my old stand by “roasted yams” with toasted walnuts.

And a nice little pineapple black bean salsa.

For the salsa combine:

  • bite size chunks of fresh pineapple
  • 1/4 of a small red onion VERY finely minced
  • a large handful of freshly chopped cilantro
  • 1 cup or 1/2 a tin of well rinsed black beans
  • 1 tbsp cumin
  • a generous squeeze of fresh lemon or lime juice
  • salt and pepper

Then set that aside to exchange flavours too.

111021

So when the roasted yams are done, take them out and turn the oven up to at least 400 degrees.

While it is pre-heating, it is time to assemble your salmon on a stick.

Start with a piece of bacon at one end and push it on to the stick, then add a piece of salmon, then bend over the bacon and poke that on, then another piece of salmon and so on.  As though you are weaving a ribbon of bacon between your salmon chunks.

Replace back on to the same tray that the bacon was cooked on.  Both for easier clean up but also to get any added flavour from bacon drippings.

111027

Bake in the hot oven for probably no more than 10 minutes.  If even that.

Keep a close eye to make sure the bacon doesn’t start to burn.

Remove and add to your favorite side dishes and you will have a great meal for any occasion!

111028

Super Snack

Well, while the others are all chowin down on chicken wings and nachos today during the big game, why don’t you try THIS one on for size!

Supersnack006

What is it they say?  Necessity is the mother of invention?  Or something like that?

I found myself home alone and completely unsupervised so I didn’t really have much motivation to cook myself anything proper.

So I dug around the kitchen and quite accidentally came up with this and what a fine invention it turned out to be!!

Turn your oven on to broil.

Get a baking sheet.

Slap on a piece of pita bread.

Put it under the broiler for a little, just long enough that it toasts a little.

Take out that try.  Turn over pita.

Toss done a handful of baby or chopped arugula for nice peppery taste.

Cover with a few slices of horseradish cheese  ( I suppose a strong cheddar would do but this horseradish stuff just kills!!).

Sprinkle with a few pine nuts or chopped walnut.

Supersnack002

Put back under the broiler until cheese melts and nuts are toasted.

Bam!

Supersnack004

Super super snack!

You could make  a bunch of them and cut them up and serve as party snacks, or do like I did and have it for dinner with a side salad.

So easy!

Supersnack008

Galette

Or sometimes known as “pastry with stuff in it”.

Now I know that I have been on a gluten-free kick lately and by no means have I abandon it.  But I haven’t actually been diagnosed with any sort of condition that prevents me from partaking in gluten, I just notice that I feel a lot better when I don’t eat it.

But once in a while, there are some things that I think just might taste better when using wheat flour.

And as a friend pointed out to me, the more you DON’T eat gluten ( assuming you don’t have a real condition that forbids it) the less trouble it will give you when you only eat it once in a while.

So I just felt like making something a little rich.   The weather hasn’t been so nice lately so eating something comforting always help.

I’m calling it “Leek and blue cheese galette”.

Start with a batch of your favorite pastry recipe.   Now IF you can make it gluten-free and taste good….then all the power to you!!  But my pastry was made with whole wheat flour.   Make a batch and put it in the fridge to chill for at least half hour.

Meanwhile, get your filling going.

Mine was super simple, cause that’s what I had.   And that is the beauty of a galette, you can fill it with just about anything, savory or sweet.

So I sautéed up:

  • 1/2 super thinly sliced leek ( I would have used more but that’s all I had)
  • 2 -3 cloves chopped garlic
  • 1 tsp thyme
  • salt & pepper

But then I realized there really wasn’t quite enough there so I chopped up a couple of brocoli florets and tossed them in too.

Set aside and wait for pastry to be cooled.

Chop up some blue cheese or whatever cheese you have and would like to use.

**************************************************************************************

When the pastry is chilled, divide into as many portions as galettes you will make, and then on a floured surface, roll out a nice round disk, maybe 8″ diameter.

Place it on a parchment covered tray (easier to fill on tray than try and move it later) and then put a generous mound of filling in the center, then top with cheese and then squash it all down a bit.   I also added a bit of Asiago cheese at the last minute.

Then just start turning the pastry in towards the middle, sort of folding it over itself.  It is okay to have some of the filling under the pastry, but most of it will be exposed.

Continue until the whole round is folded in.

Repeat with as many as you will be making.

Now I just forgot, but it is a good idea to brush the pastry with something, like a beaten egg or milk, just to help give it that nice shiny pastry look.  But no big deal it you forget.

****************************************************************************************

Bake in a 400 degree oven for 15 – 20 minutes or until cheese is melted and pastry looks baked.

Serve as desired.

You could also make smaller ones as party snacks or appetizers.

I paired them with a nice little arugula salad with shaved Asiago and oil and lemon  dressing.

*****************************************************************************************

My crazy arugula is still growing away out on the deck!!  I keep hacking it down and it just grows back!!  Let’s see if it lasts through the winter!!

*****************************************************************************************

Polenta treats

After our trip to Ulla the other night I was determined that I could make some sort of polenta treat similar to their idea!  I mean how hard can it be……..right?

Well, I’ll tell you right now, mine were NO where near as creamy delicious as their’s, but turned out to be a very nice appetizer / party snack none the less!!

Start by whipping up a batch of your favorite polenta.  ( see internet for instructions)

And then pour it out onto a parchment paper covered tray.   Shape into an as even layer as you can, being sure to square up the edges.  Then let cool till almost cold!

When cold and firm, cut into the shapes of your choice.  I chose “fry” like stick shapes on this occasion.  Spread them out away from each other.

Then brush them with olive oil on all sides.  Baking them will make them healthier than deep frying them.

Put into a 450 degree oven and let them crisp up.  Keep a close eye so they don’t burn.  When they start to get crispy on one side, take them out and turn them around till they are a lovely golden toasted colour.

Serve immediately with the dipping sauce of your choice.

Polenta treats

We just had them with mayo this time, but the wheels were turning about all the wonderful dipping sauces I might come up with in the future.

I was very pleased with the results.  I think you could make these as fancy or as casual and the occasion calls for and will certainly be a crowd pleaser!  

But if you are having dinner after them, be careful not to fill up.  It is very easy to abuse these!!  Eat with caution!

Dipping Sauces

Here are the dipping sauces that we had with our  Gyoza.  ( see yesterday’s post)

First the Chef  made up a batch of what we’ll call “basic sauce” meaning each dipping sauce starts as this and then the additional ingredients are added to make it into a specific sauce.

Basic sauce:

  • garlic
  • ginger
  • cilantro
  • green onion
  • soya sauce
  • sesame oil

Lemon Soya Sauce:

  • basic sauce
  • extra soya
  • lemon juice

Sweet miso:

  • basic sauce
  • miso paste
  • water to thin it out

Chili Thai peanut:

  • basic sauce
  • peanut butter
  • chili flakes
  • water to thin it out

Dipping sauces


Stir them up and start dippin!!
 
 
These sauces are also great for vegan sushi!   ( Click here ) to see how to make them!
 
Party snacks are my favourite food!


****************************************************************************************

Gyoza – not just a party snack

As we get closer to the holidays I am still on the quest for interesting party snacks.

The Chef suggested we make some home made “Gyoza”.   Or as I would know it as an Asian dumpling type thing.

I was willing to give it a try.  But let me warn you right off the top, these babies are pretty labour intensive and instead of them being a party snack, I would suggest having a gyoza making party! Because if you had a production line full of friends to help with this, it would make it SO much easier.

Let’s start with the filling.  Keep in mind, these can be made with pork, chicken, shrimp or completely vegetarian ( maybe even vegan if you check what’s in your won ton wrappers! )

In fact, the Chef informs me that you could even make dessert versions with mascarpone cheese and strawberries and the like!

They are a versatile snack.  But a lot of work.

Here is what we used for this batch, but feel free to substitute as needed.

  • ground raw pork
  • finely minced red onion
  • shredded carrot
  • shredded cabbage
  • finely minced garlic
  • finely minced ginger
  • soya sauce
  • white/black sesame seeds
  • raw egg

In a large skillet start with the pork and cook till almost completely done , then add all of the other ingredients except the egg.   Once all the vegetables are cooked, crack in the egg and mix it in well.  This will help hold the filling together.

Let it cool down so it will be easy to work with.

Now it is production line time!   Get everything set up to save time. 

  • Have baking sheets lined with parchment paper
  • Round won ton wrappers
  • a bowl or glass of water
  • filling mixture
  • dumpling press

The dumpling press is my new favorite toy!  Boy do I wish I had THIS baby when I was making my empanadasWould have made life SO much easier!

Dumpling press

I found this at a local hardware store for $3.00.  If you see one, pick it up.  You will love it.

So here we go.   Lay down the won ton wrapper.

Dip your finger in the water and wet the outside ring of the wrapper so it will stick together.

Add a bit of filling.  You will have to experiment until you get the exact right amount that works best.

Place with won ton wrapper full of filling on the dumpling maker.

Squeeze shut.

Open again and carefully peel the dumpling out of the mould and place on the parchment lined baking sheet.

Repeat.  ( you can see now why having a production line for this activity would help!!)

Make sure you keep the surface of your dumpling press dry by wiping it off after every few dumplings, otherwise things will start to stick.

When the tray is full put it in the freezer.   Even if you are going to be eating them soon.  This will help them keep their shape when cooking or once totally frozen you can bag them up and use them later!

So, now to cook them.

First we will boil them in a pot of water.  But only a few at a time because if they touch, they will stick!  So, boil a few and wait till they come to the surface then fish them out.

Dry them, and then into the frying pan, cook on both sides till they are a bit crispy and brown.   Same thing, only a few at a time so they don’t stick!

Then they are ready to eat!

A little dipping sauce and you are good to go!!

Gyoza with dipping sauce

************************************************************************************************

To Oscar or not to Oscar?

When I grow up and have the right kind house to host a fancy Oscar party, I will.  Or maybe I should just make a point of getting invited to a fancy one?

I’m not sure really what the big deal is with Oscar parties anyway.  I mean why the Oscars?  You don’t hear that much about Golden Globe or Grammy parties or any of the other in a long line of award events that happen this time of year.  Is it because it’s the last of the award season?  Who knows?

So what did you make for your Oscar party?  I scoured the internet for ideas but there was nothing terribly inspiring.  They seem to be big on theme items, like something to do with the nominated movies, but I hadn’t seen many of them this year so that was no help.

Instead I just went with a few of my old reliable party snacks.

We started watching quite early in the afternoon because there was the pre-red carpet and then the red carpet and then the show Oscars themselves go on for hours.  So you really need to pace yourself otherwise you can be hungry again by the end!

I started off with a nice baked cheese dip.

Baked cheese dip

In a food processor whiz up:

  • 1 medium white onion
  • 1 roasted red pepper (coarsely chopped)
  • 1/2 raw jalapeno pepper
  • 1/2 cup of cream cheese
  • 1/2 cup sour cream
  • 1/2 cup grated smokey cheese ( cheddar or gouda)
  • 1 handful of cilantro leaves

Whip until everything is well blended and transfer to a heat safe dish, ideally one with a heat safe cover.  If it doesn’t have its own lid then cover with tin foil and place in a 350 degrees oven for about 15 minutes or until it gets bubbly looking.

Remove from oven and sprinkle with some finely chopped red pepper or green onion or sprinkle with paprika.  Whatever you  have around.

Serve with crackers or bread product of your choice.

While we were stuffing our faces with that, I popped the next item into the oven.   Let’s call them “Spicy Sausage Balls” cause that’s pretty much what they are.

In a good size bowl combine:

  • 1/2 cup finely chopped red pepper
  • 1/2 nibblet corn ( canned is fine but frozen is better)
  • 3 finely chopped green onions
  • 1 egg lightly beaten
  • 1/2 cup grated smoked cheese of your choice
  • 1 package ( aprox 1 pound) bulk spicy Italian sausage
  • 1 cup of store-bought biscuit  mix

Then get your hands in there and squish and squish until all the ingredients are well mixed.  Then start rolling the mixture into balls.  Depending on what you are using them for, they can be anywhere from the size of a golf ball to the size of a grape.  Just make sure what ever you decide, you make them all the same size so they will cook evenly.

Place them on a cookie sheet lined with our old friend parchment for easy clean up and put them in a 350 degree oven.  Depending on the size anywhere from 10 to 20 minutes.  You will know they are done because you will smell their deliciousness!  And they should look lightly browned all over.

Try to let them cool a little when you take them out of the oven because you will burn your mouth!  They can be eaten hot or at room temperature, with a dip or without!  Enjoy!

Spicy Sausage Ball